
SDL GPU API Concepts: Sprite Batcher
2025-01-23
I am repeatedly asked the question, “Now that there’s an implementation of the SDL Render API on top of the SDL GPU API, why doesn’t the SDL Render API just add shader support?” My response to this question is always the same: “Writing a sprite batcher isn’t that hard. You could do it in an afternoon with a cup of tea.” I stand by that. Extending the Render API would be messy, suboptimal, and any design we could come up with probably wouldn’t satisfy everyone’s needs anyway.
Writing your own sprite batching structure will give you the flexibility to solve any rendering needs that might arise in your project. But it’s easy for me to say that - time to put my money where my mouth is and detail how to actually just write a sprite batcher for those who are new to the world of GPU programming.
Note that for the purposes of this article I will be writing C-esque pseudocode snippets. Please don’t expect this code to compile as-is. For shaders I will write HLSL code and these programs will be valid. Complete example code will be linked at the end of the tutorial.
The Problem
So you want to draw a bunch of sprites. Seems easy, just bind your graphics pipeline, your sprite texture and issue a draw call, right?
SDL_BindGPUGraphicsPipeline(myCommandBuffer, mySpritePipeline);
SDL_BindGPUVertexBuffers(mySpriteVertexBuffer);

for (Uint32 i = 0; i < SPRITE_COUNT; i += 1)
{
    SDL_BindGPUFragmentSamplers(sprites[i].texture, pointSampler);
    SDL_DrawGPUPrimitives(6, 1, 0, 0);
}
Wrong! You can probably get away with this on a high-end desktop, but lower end GPUs will suffer greatly under this workload.
Imagine that you wanted to bake some cookies. You put one scoop of dough in the oven at a time, wait for it to bake, take it out, and then repeat until your two dozen cookies are done. Does that sounds like a good idea? That’s what you’re doing here. Instead you would probably want to bake those cookies in a batch.
The key to GPU workload optimization is minimizing state changes. There are a few tools in our graphics toolbox that can help us with this.
Sprite Atlas
If we want to draw a bunch of sprites without switching the render state, then it is obvious that we need those sprites to live on the same texture. There are a bunch of tools that can accomplish the task of packing sprites into a texture. I wrote a command-line interface tool called Cram that I use. It takes a folder structure of PNGs and emits a PNG of the packed PNGs and a JSON file containing metadata about the location each sprite was packed to. Any packer that suits your fancy should be just fine though.
A crucial concept here is that of a “texture coordinate”. Texture coordinate space contains values in the range [0, 1]. (0, 0) would be the top left, and (1, 1) would be the bottom right. The coordinate (0.5, 0.5) would be smack in the middle of the texture.
For the purposes of this demonstration, I have created a sprite atlas manually:

Each member of the ravioli gang is individually 16x16, packed into a 32x32 bitmap. This means that each ravioli’s texture coordinate dimensions are 0.5 by 0.5.
Encoding Information
Let’s review the general structure of a graphics pipeline.
A draw call specifies a vertex count. Vertices are taken from a vertex buffer and transformed in parallel by a vertex shader. The resulting triangles from the vertex shader are rasterized (meaning that pixels contained inside the shape are identified). The resulting pixels (or fragments) from the rasterization are then colored in parallel by a fragment shader. Finally, these colors are written to the render target with the selected blend mode.
If our goal is to eliminate state changes, we can accomplish that by encoding information into a buffer that is available to the vertex shader. This allows the GPU pipelining to be as efficient as possible because it doesn’t have to stop working in order to change state. It’s just pulling data out of a bound buffer.
What information do we need in order to draw sprites? We need rectangles. We need to be able to rotate or scale these rectangles. We need to sample a specific region of a texture to draw in the rectangle. We might want to blend a color. It turns out we can easily represent all of this information in a storage buffer.
The old-fashioned way
One possible approach for sprite batching is to build a vertex buffer in CPU code.
SpriteVertex *spriteMapPointer = SDL_MapGPUTransferBuffer(myTransferBuffer);

// transform and calculate left, top, right, and bottom coordinates here

spriteMapPointer[0].position = (left, top);
spriteMapPointer[1].position = (right, top);
spriteMapPointer[2].position = (left, bottom);
spriteMapPointer[3].position = (right, bottom);

// write other fields here

SDL_UnmapGPUTransferBuffer(myTransferBuffer);

// upload, etc
This will work fine, but the CPU has to execute all these calculations serially. We would get an enormous performance boost from leveraging the massively parallel capabilities of the GPU.
The Vertex Shader
We’re going to do something a little bit clever. When issuing draw calls, we actually don’t need to have a vertex buffer bound. If there is no vertex buffer input, the vertex shader function can take in an ID and we can build outputs using that ID.
Let’s break down this shader piece by piece.
struct SpriteData
{
    float3 Position;
    float Rotation;
    float2 Scale;
    float2 Padding;
    float TexU, TexV, TexW, TexH;
    float4 Color;
};

StructuredBuffer<SpriteData> DataBuffer : register(t0, space0);

struct Output
{
    float2 Texcoord : TEXCOORD0;
    float4 Color : TEXCOORD1;
    float4 Position : SV_Position;
};
We have DataBuffer bound as a storage buffer. DataBuffer is a buffer of SpriteData structs. Each SpriteData struct contains what we need to render the sprite - its position, rotation, scale, texture coordinate rectangle, and color.
You might be wondering about the Padding field. It is very important to note that storage buffers have to follow the “GLSL std140 layout” specification. In practical terms, this means that float3 and float4 fields of a struct must be aligned to 16 bytes. Since we have a float2 field, it means the following float4 field will automatically be placed on the next 16-byte alignment. I add the padding field to make it obvious that this padding is occurring.
The output to the fragment shader will be a texture coordinate, a color value, and the position of the vertex.
static const uint triangleIndices[6] = {0, 1, 2, 3, 2, 1};
static const float2 vertexPos[4] = {
    {0.0f, 0.0f},
    {1.0f, 0.0f},
    {0.0f, 1.0f},
    {1.0f, 1.0f}
};
These static arrays represent the vertices of a 1x1 quad with the top-left vertex at (0, 0). These vertices will be transformed to obtain our final quad geometry.
cbuffer UniformBlock : register(b0, space1)
{
    float4x4 ViewProjectionMatrix : packoffset(c0);
};
Our uniform buffer contains a view-projection matrix, which we will use to transform the vertex position from world space to screen space.
Output main(uint id : SV_VertexID)
{
    uint spriteIndex = id / 6;
    uint vert = triangleIndices[spriteIndex % 6];
    SpriteData sprite = DataBuffer[spriteIndex];

    float2 texcoord[4] = {
        {sprite.TexU,               sprite.TexV              },
        {sprite.TexU + sprite.TexW, sprite.TexV              },
        {sprite.TexU,               sprite.TexV + sprite.TexH},
        {sprite.TexU + sprite.TexW, sprite.TexV + sprite.TexH}
    };

    float c = cos(sprite.Rotation);
    float s = sin(sprite.Rotation);

    float2 coord = vertexPos[vert];
    coord *= sprite.Scale;
    float2x2 rotation = {c, s, -s, c};
    coord = mul(coord, rotation);

    float3 coordWithDepth = float3(coord + sprite.Position.xy, sprite.Position.z);

    Output output;

    output.Position = mul(ViewProjectionMatrix, float4(coordWithDepth, 1.0f));
    output.Texcoord = texcoord[vert];
    output.Color = sprite.Color;

    return output;
}
Unlike most vertex shaders, our input is not a vertex structure - it’s just an ID which ranges from 0 to the number of vertices in the draw call. This ID is provided automatically and each invocation of the vertex shader gets its own ID - the first vertex is ID 0, the second vertex is ID 1, and so on. First, integer division of the ID by 6 will give us an index that we can use with our DataBuffer. Then we can take the ID % 6 with an index lookup to find which vertex of the quad we are transforming - 0 is top-left, 1 is top-right, 2 is bottom-left, and 3 is bottom-right.
Once we get the position of the vertex after scaling, rotation, and translation, we multiply it by the view-projection matrix to get the coordinate in screen space. We get the texture coordinate based on the vertex. Color is just passthrough from the input.
And that’s it for the vertex shader. Not bad for about 60 lines of code.
The Fragment Shader
Texture2D<float4> Texture : register(t0, space2);
SamplerState Sampler : register(s0, space2);

struct Input
{
    float2 TexCoord : TEXCOORD0;
    float4 Color : TEXCOORD1;
};

float4 main(Input input) : SV_Target0
{
    return input.Color * Texture.Sample(Sampler, input.TexCoord);
}
This is basically self-explanatory. We sample from the bound texture using the texture coordinate we got from the vertex shader, and multiply it by the color we got from the vertex shader. All done.
The Graphics Pipeline
SpritePipeline = SDL_CreateGPUGraphicsPipeline(
    myDevice,
    &(SDL_GPUGraphicsPipelineCreateInfo){
        .target_info = (SDL_GPUGraphicsPipelineTargetInfo){
            .num_color_targets = 1,
            .color_target_descriptions = (SDL_GPUColorTargetDescription[]){{
                .format = SDL_GetGPUSwapchainTextureFormat(myDevice, myWindow),
                .blend_state = {
                    .enable_blend = true,
                    .color_blend_op = SDL_GPU_BLENDOP_ADD,
                    .alpha_blend_op = SDL_GPU_BLENDOP_ADD,
                    .src_color_blendfactor = SDL_GPU_BLENDFACTOR_SRC_ALPHA,
                    .dst_color_blendfactor = SDL_GPU_BLENDFACTOR_ONE_MINUS_SRC_ALPHA,
                    .src_alpha_blendfactor = SDL_GPU_BLENDFACTOR_SRC_ALPHA,
                    .dst_alpha_blendfactor = SDL_GPU_BLENDFACTOR_ONE_MINUS_SRC_ALPHA,
                }
            }}
        },
        .primitive_type = SDL_GPU_PRIMITIVETYPE_TRIANGLELIST,
        .vertex_shader = pullSpriteVertShader,
        .fragment_shader = texturedQuadFragShader
    }
);
The graphics pipeline creation is about as simple as it gets, particularly because there is no vertex input state required. The primitive type is a triangle list. We give the pipeline our compiled shaders. In this example we assume that we are drawing straight to the swapchain, but you could use a different texture format, and even optionally include a depth buffer here if you want.
The blend state is a standard alpha blending setup, which basically means that pixels in the texture with an alpha value of 0 will not draw over existing colors. Explaining blend states more thoroughly is outside the scope of this tutorial, but there’s plenty of explanations of blending out there if you need one.
The Sprite Storage Buffer
typedef struct SpriteInstance
{
	float x, y, z;
	float rotation;
	float w, h;
    float padding_a, padding_b;
	float tex_u, tex_v, tex_w, tex_h;
	float r, g, b, a;
} SpriteInstance;

static float uCoords[4] = { 0.0f, 0.5f, 0.0f, 0.5f };
static float vCoords[4] = { 0.0f, 0.0f, 0.5f, 0.5f };

...

// Build sprite instance transfer
SpriteInstance* dataPtr = SDL_MapGPUTransferBuffer(
    context->Device,
    SpriteDataTransferBuffer,
    true
);

for (Uint32 i = 0; i < SPRITE_COUNT; i += 1)
{
    int ravioli = rand() % 4;
    dataPtr[i].x = (float)(rand() % 640);
    dataPtr[i].y = (float)(rand() % 480);
    dataPtr[i].z = 0;
    dataPtr[i].rotation = 0;
    dataPtr[i].w = 32;
    dataPtr[i].h = 32;
    dataPtr[i].tex_u = uCoords[ravioli];
    dataPtr[i].tex_v = vCoords[ravioli];
    dataPtr[i].tex_w = 0.5f;
    dataPtr[i].tex_h = 0.5f;
    dataPtr[i].r = 1.0f;
    dataPtr[i].g = 1.0f;
    dataPtr[i].b = 1.0f;
    dataPtr[i].a = 1.0f;
}

SDL_UnmapGPUTransferBuffer(context->Device, SpriteDataTransferBuffer);
This buffer will cause random raviolis to be drawn all over the place. Once this data has been built into the transfer buffer, we have to upload it:
// Upload sprite data
SDL_GPUCopyPass* copyPass = SDL_BeginGPUCopyPass(cmdBuf);
SDL_UploadToGPUBuffer(
    copyPass,
    &(SDL_GPUTransferBufferLocation) {
        .transfer_buffer = SpriteDataTransferBuffer,
        .offset = 0
    },
    &(SDL_GPUBufferRegion) {
        .buffer = SpriteDataBuffer,
        .offset = 0,
        .size = SPRITE_COUNT * sizeof(SpriteInstance)
    },
    true
);
SDL_EndGPUCopyPass(copyPass);
Rendering
Everything is now in place for our draw call. All we have to do is set up the render state.
// Render to the swapchain texture
SDL_GPURenderPass* renderPass = SDL_BeginGPURenderPass(
    cmdBuf,
    &(SDL_GPUColorTargetInfo){
        .texture = swapchainTexture,
        .cycle = false,
        .load_op = SDL_GPU_LOADOP_CLEAR,
        .store_op = SDL_GPU_STOREOP_STORE,
        .clear_color = { 0, 0, 0, 1 }
    },
    1,
    NULL
);

// Bind the sprite pipeline
SDL_BindGPUGraphicsPipeline(renderPass, SpritePipeline);

// Bind the sprite data buffer as a storage buffer
SDL_BindGPUVertexStorageBuffers(
    renderPass,
    0,
    &SpriteDataBuffer,
    1
);

// Bind the ravioli atlas
SDL_BindGPUFragmentSamplers(
    renderPass,
    0,
    &(SDL_GPUTextureSamplerBinding){
        .texture = Texture,
        .sampler = Sampler
    },
    1
);

Matrix4x4 cameraMatrix = Matrix4x4_CreateOrthographicOffCenter(
    0,
    640,
    480,
    0,
    0,
    -1
);

// Push the view-projection matrix as vertex uniform data
SDL_PushGPUVertexUniformData(
    cmdBuf,
    0,
    &cameraMatrix,
    sizeof(Matrix4x4)
);

// Draw 6 vertices per sprite!
SDL_DrawGPUPrimitives(
    renderPass,
    SPRITE_COUNT * 6,
    1,
    0,
    0
);

SDL_EndGPURenderPass(renderPass);
The result:
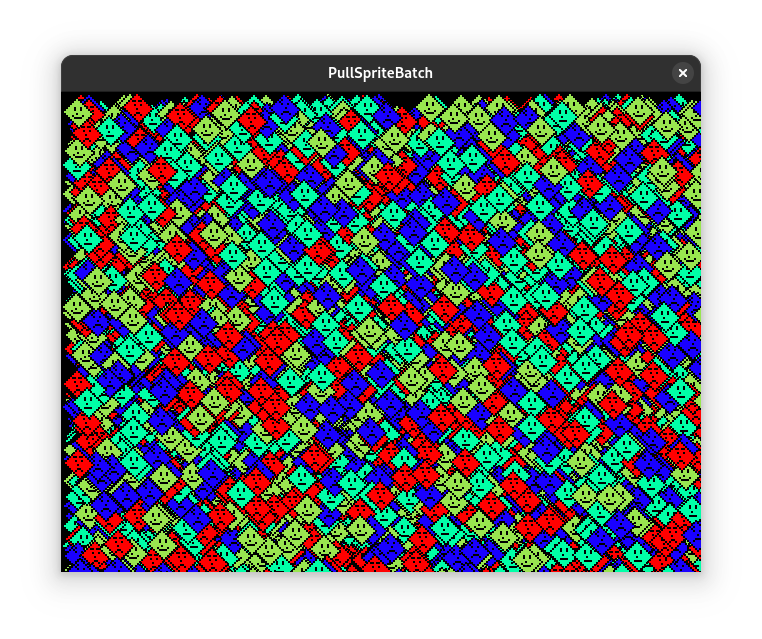
This example draws 8192 sprites at 3400 frames per second on my test machine. Hopefully that’s fast enough for you.
Conclusion
This example code is pretty flat, but you could easily wrap it in an API, and at this point whatever API you write can suit your own needs for sprite rendering. You can swap in a nifty fragment shader if you want or modify the vertex inputs. The world is your oyster.
My only advice is to make breaking the batch explicit in your API. This will make it more obvious how to structure your client code in a performant way.
A complete C example that uses the above technique can be found in our examples repo.
Happy batching!